

Mastering Travel Photography is about much more than owning good gear. It is a combination of observation, timing, composition, and patience. The strongest images come from people who notice light, respect culture, and understand how to shape a scene into a story.
Travel is more than moving from one place to another. It is a collection of moments, textures, colours, gestures, and emotions that disappear quickly if you do not learn how to preserve them. That is where Mastering Travel Photography becomes more than a creative skill; it becomes a way of seeing. A great travel photo does not only show where you went. It shows what the place felt like, how light touched the scene, and why that moment mattered.
Many people think travel photography is about expensive gear or perfect destinations. In reality, it is about awareness. It is about noticing the quiet details in a busy street, the warm light falling on a mountain ridge, or the expression on a local vendor’s face as the day begins. Mastering Travel Photography means learning how to tell those stories with intention, not luck.
What Is Travel Photography
Travel photography is the art of documenting places, people, culture, architecture, food, landscapes, and everyday life while traveling. It can be broad and expressive, or minimal and intimate. Some photographers focus on sweeping mountain views, while others prefer street scenes, markets, portraits, or small details that reflect the soul of a destination.
At its best, travel photography combines storytelling and observation. It is not just about taking a beautiful picture. It is about creating visual context. A single image can reveal how a city moves, how a culture expresses itself, or how nature shapes a region. That is why Mastering Travel Photography requires both technical skill and emotional sensitivity.
Travel photography also overlaps with landscape photography, cultural photography, outdoor photography, and street photography travel. The strongest photographers learn to move comfortably between these styles without losing their personal voice.
Why Travel Photos Feel So Powerful
Travel images are powerful because they trigger memory and curiosity at the same time. A strong image can remind you of your own journey, inspire someone else to visit a place, or encourage viewers to learn more about a culture. Human psychology plays a major role here. People connect to images that feel real, familiar, or emotionally alive.
That is why travel photography tips are not only about camera settings. They are also about perception. Viewers respond to atmosphere, contrast, facial expression, color harmony, and visual tension. A technically perfect photo can still feel empty if it has no story. A slightly imperfect image can feel unforgettable if it captures truth.
How to Improve Travel Photography
Improving your travel photography begins before you even pick up your camera. Start by observing how a location changes throughout the day. Morning light, midday contrast, and evening shadows all create different moods. Walk slowly. Look for layers, reflections, symmetry, and movement. Wait for people to enter the frame instead of forcing the shot.
Another important step is to shoot with intention. Instead of taking dozens of random photos, ask yourself what the image should communicate. Is it scale, energy, isolation, calm, or cultural identity? This mindset is one of the fastest ways to improve travel photography because it moves you from recording to storytelling.
You should also review your photos honestly. Look for patterns in your mistakes. Are your horizons tilted? Are your subjects too centred? Are you missing foreground interest? Once you know your habits, you can correct them.
Travel Photography Tips for Beginners
For beginners, the best strategy is to start simple. Use a camera or phone you already know well. Learn how exposure works. Understand how light changes across the day. Practice framing your subject without rushing. The strongest travel images often come from patience rather than speed.
A few practical travel photography tips for beginners are especially useful. First, always carry your camera in a way that makes it easy to access. Great moments happen quickly. Second, simplify your composition so the viewer knows where to look. Third, photograph local scenes instead of waiting only for iconic landmarks. Fourth, take a few minutes to study your environment before shooting.
Do not worry about being perfect. Beginners often improve faster when they focus on consistency rather than complexity. Capture one strong frame instead of ten average ones. Over time, your eye will become sharper, and your instincts will improve naturally.
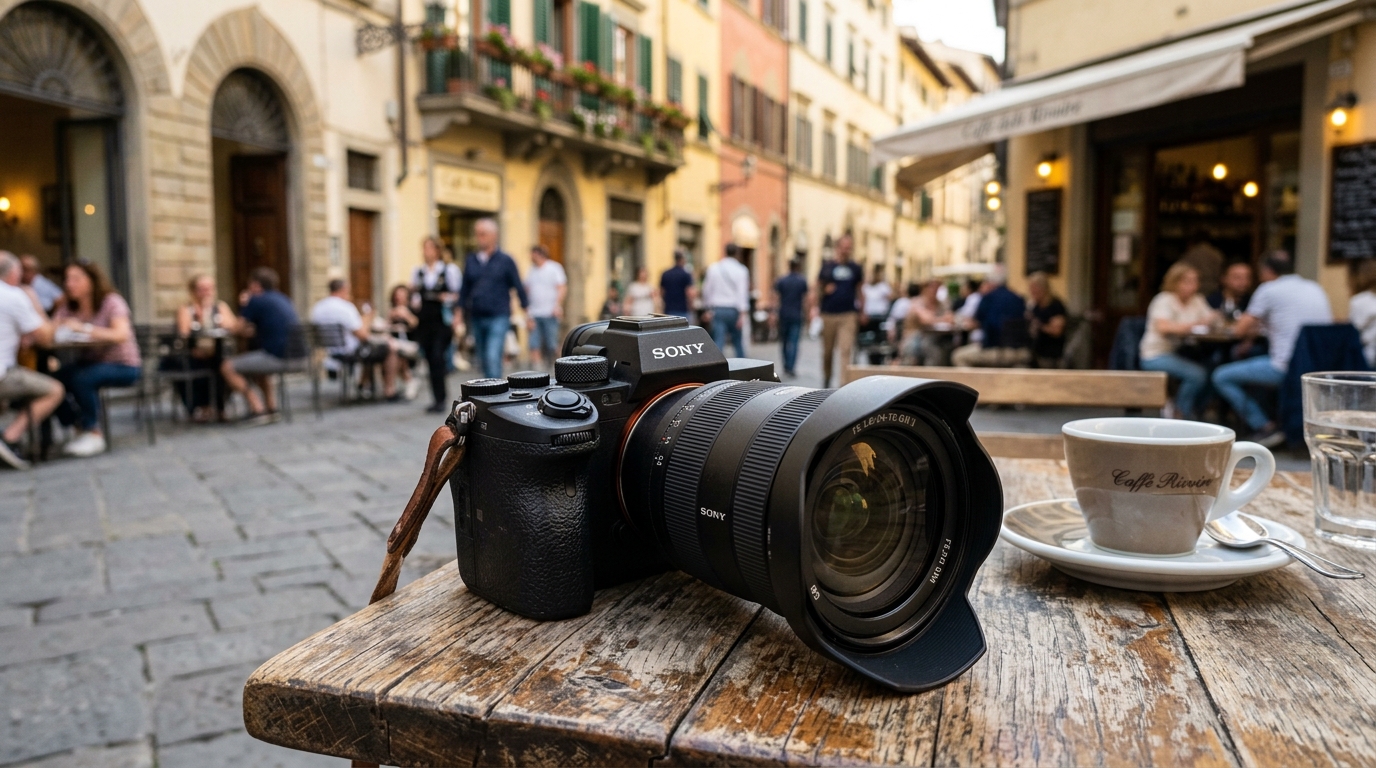
Best Travel Photography Equipment
The best travel photography equipment depends on how you travel, but versatility matters more than quantity. A lightweight camera body, one or two reliable lenses, extra batteries, memory cards, and a comfortable bag are usually enough for most trips. Travel camera gear should support mobility, not slow you down.
Here is a simple guide:
| Equipment | Why It Helps | Best Use |
|---|---|---|
| Lightweight mirrorless camera | Portable and flexible | General travel, street scenes, landscapes |
| Wide-angle lens | Captures scale and environment | Architecture, mountains, city streets |
| Standard zoom lens | Balanced and versatile | Everyday destination photography |
| Prime lens | Sharp and compact | Low-light scenes, portraits, cultural moments |
| Spare batteries | Prevents missed opportunities | Long travel days |
| Extra memory cards | Protects your workflow | Multi-day trips |
| Small tripod | Stabilizes low-light shots | Sunset, night scenes, long exposures |
| Lens cloth | Keeps images clean | Dust, rain, humid conditions |
The best travel photography equipment is the kit you can actually carry all day without frustration. If your gear makes you reluctant to shoot, it is too heavy.
Best Camera Settings for Travel Photography
Camera settings should match the scene, not the other way around. There is no single perfect formula, but there are practical starting points that work well in many situations.
| Situation | Suggested Starting Settings | Why It Works |
|---|---|---|
| Bright daylight | ISO 100, faster shutter, aperture around f/5.6–f/8 | Keeps detail sharp and exposure balanced |
| Street scenes | Auto ISO or ISO 400–1600, fast shutter | Freezes movement and handles changing light |
| Landscapes | ISO 100, aperture f/8–f/11 | Maximizes sharpness and depth of field |
| Portraits while traveling | Aperture f/1.8–f/4 if possible | Separates subject from background |
| Night travel scenes | Higher ISO, slower shutter, tripod if needed | Preserves detail in low light |
To truly understand the best camera settings for travel photography, you need to adapt quickly. Learn how to change ISO, shutter speed, and aperture without thinking too hard. In travel situations, speed matters because scenes change fast. Keep your settings flexible and use exposure compensation when bright skies or dark shadows trick your meter.
Travel Photography Composition Guide
Composition is what turns an ordinary image into a memorable one. A strong travel photography composition guide begins with simplicity. Choose a clear subject, then support it with lines, shapes, and context. Use leading lines to guide the viewer through the frame. Frame within a frame when doors, windows, arches, or trees help tell the story. Include foreground elements to add depth.
Rule of thirds is helpful, but it is not a rule you must obey every time. Sometimes central composition creates strength and balance. Sometimes a subject placed off-center feels more dynamic. The real goal is visual clarity.
Great photography composition techniques also include layering. Try to place an interesting foreground, a meaningful middle ground, and a strong background into one scene. This creates depth and makes the photo feel immersive. In travel photography, composition is often what separates a snapshot from a polished image.
How to Photograph Landscapes While Travelling
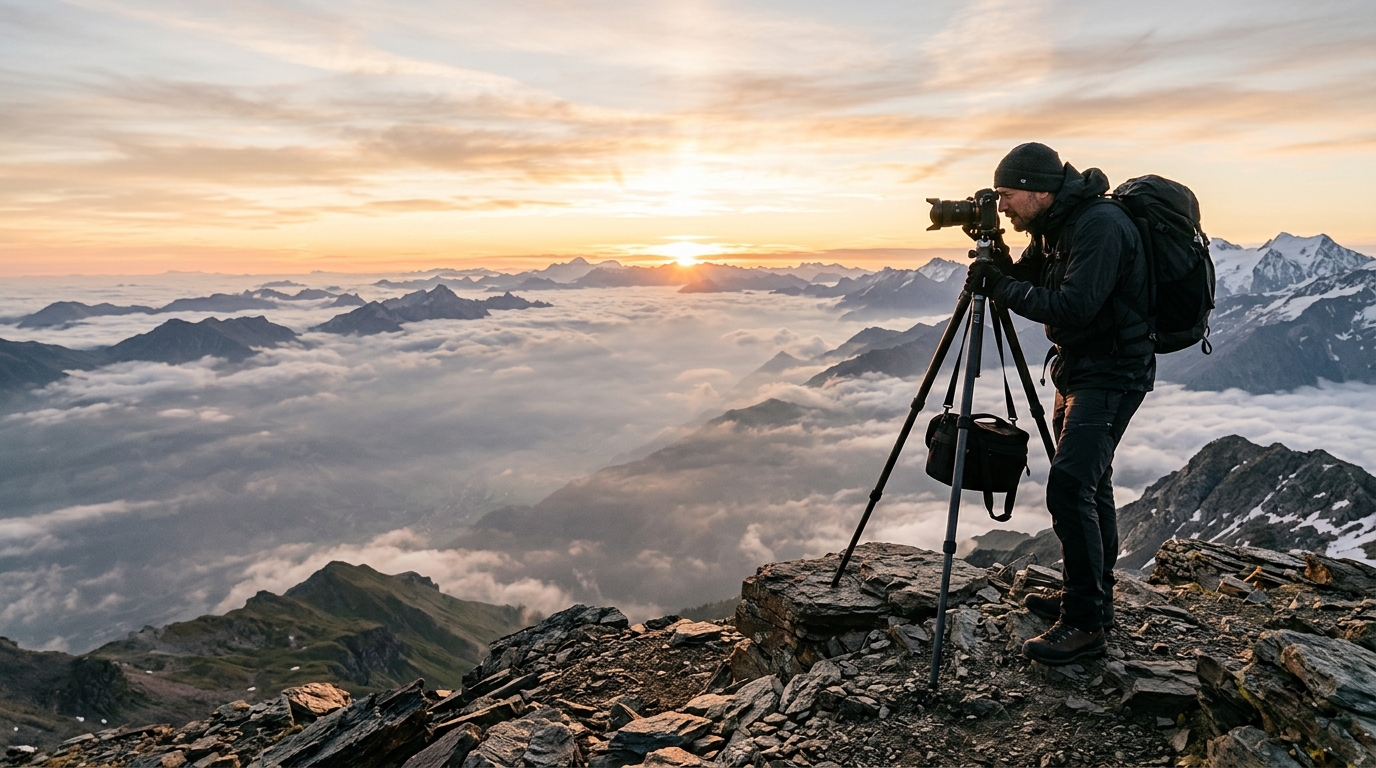
Landscape photography during a trip requires timing, patience, and a sense of place. The best landscapes are not always the biggest or most famous. Often, the most powerful scenes are the ones that feel connected to the journey. Watch the weather carefully, because clouds, mist, rain, and golden light can transform the same location in completely different ways.
When learning how to photograph landscapes while travelling, pay attention to scale. Add a person, a road, a tent, or a building to show the size of the environment. This makes the scene more relatable. Also watch your horizons and try to create clean layers that lead the eye naturally.
Landscape photography while travelling is especially rewarding at sunrise and sunset, when outdoor photography becomes more atmospheric. If you have time, return to the same location more than once. The light may be different enough to change everything.
How to Capture Local Culture in Photos
Culture gives travel photos depth. A beautiful view is memorable, but a human moment often feels even more alive. To understand how to capture local culture in photos, spend time observing respectfully before taking pictures. Watch how people interact, how they work, and how they move through public spaces.
Cultural photography is strongest when it feels honest. Focus on details such as hands preparing food, clothing textures, market displays, signs, rituals, or daily routines. These images tell stories that go beyond postcards. When photographing people, body language and expression matter as much as background.
Respect is essential. Ask permission when needed, especially in intimate or personal situations. Smile. Be patient. Sometimes the best image comes after a conversation, not before it. Travel photography should never feel extractive; it should feel collaborative and human.
How to Take Professional Travel Photos
Professional-looking travel images usually share a few traits: thoughtful composition, controlled exposure, and clear storytelling. If you want to understand how to take professional travel photos, start by slowing down your process. Do not shoot too quickly. Decide what should be included and what should be left out.
Watch your edges. Many amateur images are distracted by random objects at the border of the frame. Clean edges make photos feel more intentional. Also try to create contrast between subject and background so the eye lands exactly where you want.
Consistency matters too. Professional travel photography is not just one lucky shot. It is a repeatable visual style. Over time, you should learn the kind of light, colour palette, and subject matter that fit your voice. That is how Mastering Travel Photography becomes a craft instead of a hobby.
How to Edit Travel Photos Professionally
Editing should refine the image, not rescue a weak one. The goal of travel photo editing is to preserve the feeling of the original scene while improving clarity and balance. Start with exposure, contrast, and white balance. Then adjust highlights and shadows carefully so the image still feels natural.
When learning how to edit travel photos professionally, think in terms of mood. Warm tones can create nostalgia. Cooler tones can feel calm or cinematic. More saturation can communicate energy, but too much can make the photo look unrealistic. A professional edit usually feels confident but restrained.
Crop only when needed. Remove distractions if they do not support the story. Sharpen gently. Reduce noise where necessary. If you edit many travel photos from one trip, try to keep the same visual style across the set so the collection feels cohesive.
How to Take Better Vacation Photos
Many people want to know how to take better vacation photos without becoming technical experts. The answer is surprisingly simple: be present, be prepared, and be selective. Vacation photography improves when you stop thinking only about the checklist of sights and start noticing the rhythm of the trip.
Capture small moments as well as famous landmarks. The coffee on the table, the train platform, the evening walk, and the first glimpse of a skyline can all matter just as much as the postcard view. These photos often feel more personal later.
Also, involve people in the story. Vacation photos become stronger when they show interaction, not just scenery. A friend looking out at the ocean or a family crossing a market square adds emotion and context. That is often what makes a vacation album feel alive.
Conclusion
Travel is temporary, but photography can hold onto its meaning. When you approach each trip with curiosity and care, your images become more than memories. They become evidence of how you saw the world in that moment. That is the real value of Mastering Travel Photography.
The more you practice, the more your eye will sharpen. You will notice better light, stronger stories, and more human detail. Eventually, you will stop asking how to make a photo look like travel photography and start creating images that feel like your own signature. That is when your work begins to stand out.
FAQ
1. What gear do I need to start travel photography?
A lightweight camera, one versatile lens, extra batteries, and enough memory storage are enough to begin. You do not need a huge kit to make strong images.
2. How can I improve my compositions quickly?
Look for clean backgrounds, strong subject placement, and natural lines that lead the eye. Fewer distractions usually create a stronger image.
3. Is a phone good enough for travel photography?
Yes. A phone can capture excellent travel images if you understand light, framing, and editing. Skill matters more than device in many situations.
4. How do I photograph people respectfully while traveling?
Be patient, observe first, and ask before taking close portraits. Respect matters more than the shot.
5. What is the best way to keep travel photos consistent?
Use similar editing choices, a steady color style, and a clear storytelling approach throughout the trip. Consistency helps create a professional-looking collection.
6. How often should I practice travel photography?
As often as possible. Practice during short walks, local outings, and everyday moments. The more you train your eye, the faster you improve.


